Product handbook
A guide for people who answer student questions
Find the right menu, learn the limits, and set up an assistant that helps a student understand their options. The steps stay practical. The reason behind them is simple: a real person is waiting for a clear answer.
What do you need to do?
Start with the job in front of you. Each guide still tells you where to click and what success looks like. It also says why the step matters, so the work stays in service of a student rather than a checklist.
We would rather the assistant say “I don’t know, let me get a person” than invent a fee, a deadline, or an eligibility decision. Speed is useful only when the answer is relevant and honest.
Find your way around the dashboard
The organization name sits at the top of the left sidebar. Check it before you create a bot, invite someone, or look at usage. The word under that name is your role on the team, not your subscription plan.
A quick glance here prevents a common mix-up: editing the wrong institute’s assistant while a student is waiting on the right one.
- Overview is a snapshot of bots, chats, leads, and trained sources. Those counts show activity. They are not the same as the capacity left on your plan.
- Bot Configuration → Interactions is where the assistant introduces itself, explains support, and asks for contact details. Training Data is what it is allowed to know. API Setup is how it appears on your website.
- Users → Conversations is where a person can join a chat. Leads keeps the enquiry and the next action together, so a student does not have to start again. Organization members is who on your team can see that work.
- Subscription shows the plan and what you have used. Manage billing & invoices is for payment details and receipts.
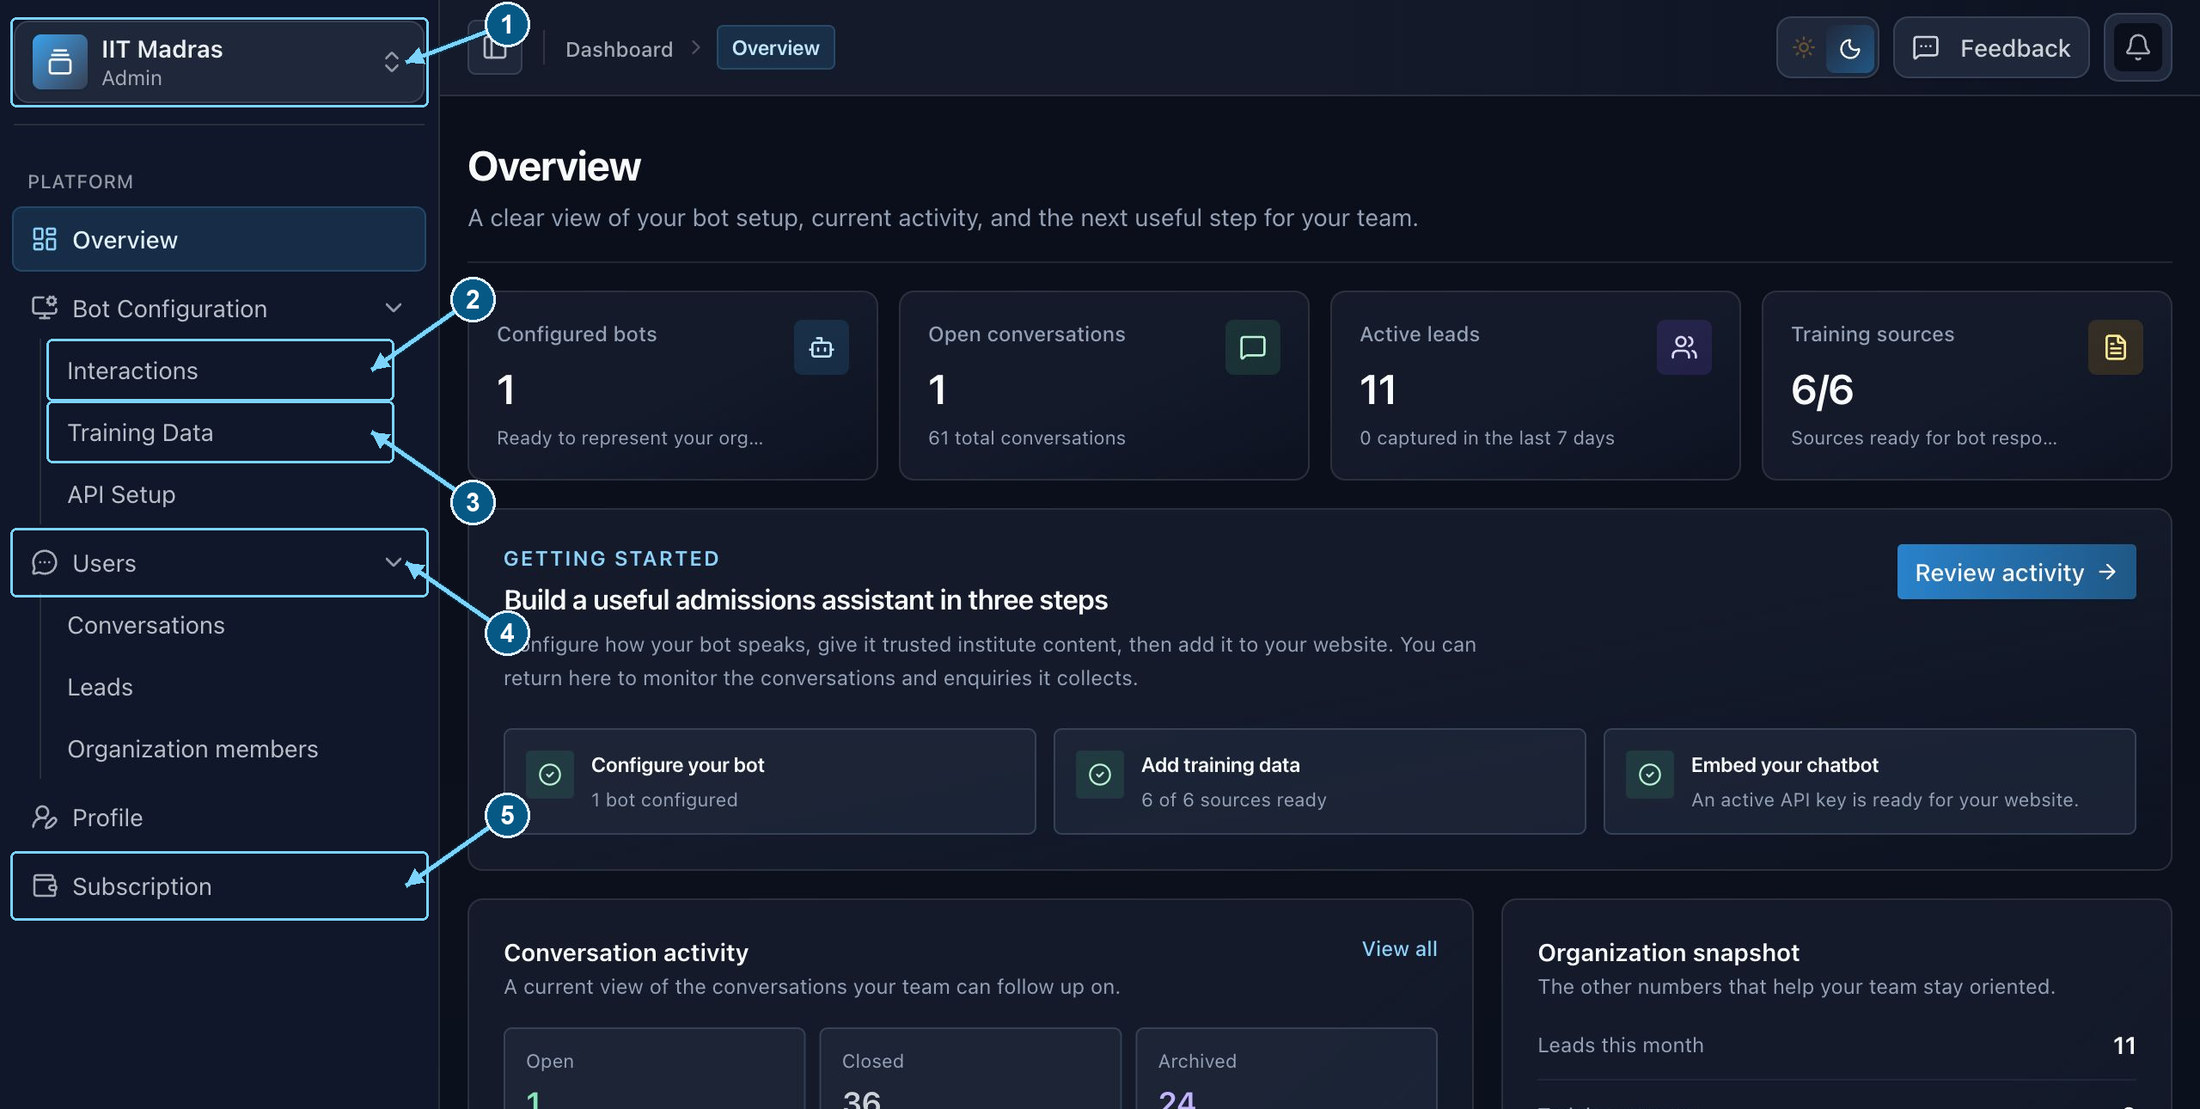
Use the sidebar for setup and daily work. The bell at the top-right opens notifications.
Enlarge- Check the active organization
- Configure identity and messages
- Upload and train knowledge
- Support workspace
- Plan, limits, and billing
Follow the setup sequence
- 1
Choose your organization
Accept an invitation, or create the workspace that will own the bot. This keeps one institute’s students, knowledge, and billing together.
- 2
Configure the bot
Give it a name, a greeting, a short description of the institute, and honest support details. Only then decide which contact details are worth asking for.
- 3
Add and train approved sources
An upload is not yet knowledge. Wait until each source says Trained, then ask the questions a student would actually ask.
- 4
Install and verify the widget
Create a key for this bot, use your published widget, and try it on the real website. A student should meet the same assistant you just tested.
- 5
Look after it with your team
Watch for people asking to speak with someone, review new enquiries, and replace material when fees or dates change. An assistant is only as current as the knowledge you maintain.
Use the screenshots and checks
The numbered arrows point at the control we mean. Open an image if you want a closer look. Names, counts, and dates in the pictures are examples. Use the values that belong to your own institute.